										<receiver

										android:name="com.clevertap.android.sdk.pushnotification.CTPushNotificationReceiver"

										android:exported="false"

										android:enabled="true">

									</receiver>
										import android.app.NotificationManager;

										CleverTapAPI.createNotificationChannel(getApplicationContext(),"YourChannelId","Your Channel Name","Your Channel Description",NotificationManager.IMPORTANCE_MAX,true);
										import android.app.NotificationManager

										CleverTapAPI.createNotificationChannel(getApplicationContext(),"YourChannelId","Your Channel Name","Your Channel Description",NotificationManager.IMPORTANCE_MAX,true);
										public class MyFcmMessageListenerService extends FirebaseMessagingService {


											@Override

											public void onMessageReceived(RemoteMessage message){

												try {

													if (message.getData().size() > 0) {

														Bundle extras = new Bundle();

														for (Map.Entry<String, String> entry : message.getData().entrySet()) {

															extras.putString(entry.getKey(), entry.getValue());

														}


														NotificationInfo info = CleverTapAPI.getNotificationInfo(extras);


														if (info.fromCleverTap) {

															CleverTapAPI.createNotification(getApplicationContext(), extras);

														} else {

															// not from CleverTap handle yourself or pass to another provider

														}

													}

												} catch (Throwable t) {

												   Log.d("MYFCMLIST", "Error parsing FCM message", t);

												}

											}


										@Override

										Public void onNewToken(@NonNull String s)

										{

											super.onNewToken(s);

											cleverTapDefaultInstance=CleverTapAPI.getDefaultInstance(getApplicationContext());

											cleverTapDefaultInstance.pushFcmRegistrationId(s,true);


										}


										}
										class MyFcmMessageListenerService : FirebaseMessagingService() {


											override fun onMessageReceived(message: RemoteMessage) {


												message.data.apply {

													try {

														if (size > 0) {

															val extras = Bundle()

															for ((key, value) in this) {

																extras.putString(key, value)

															}

															val info = CleverTapAPI.getNotificationInfo(extras)

															if (info.fromCleverTap) {

																CleverTapAPI.createNotification(applicationContext, extras)

															} else {

																// not from CleverTap handle yourself or pass to another provider

															}

														}

													} catch (t: Throwable) {

														Log.d("MYFCMLIST", "Error parsing FCM message", t)

													}

												}

												}

											}
<receiver
android:name="com.clevertap.android.sdk.pushnotification.CTPushNotificationReceiver"
android:exported="false"
android:enabled="true">
</receiver>
<service
android:name=".fcm.FcmMessageListenerService">
<intent-filter>
<action android:name="com.google.firebase.MESSAGING_EVENT"/>
</intent-filter>
</service>
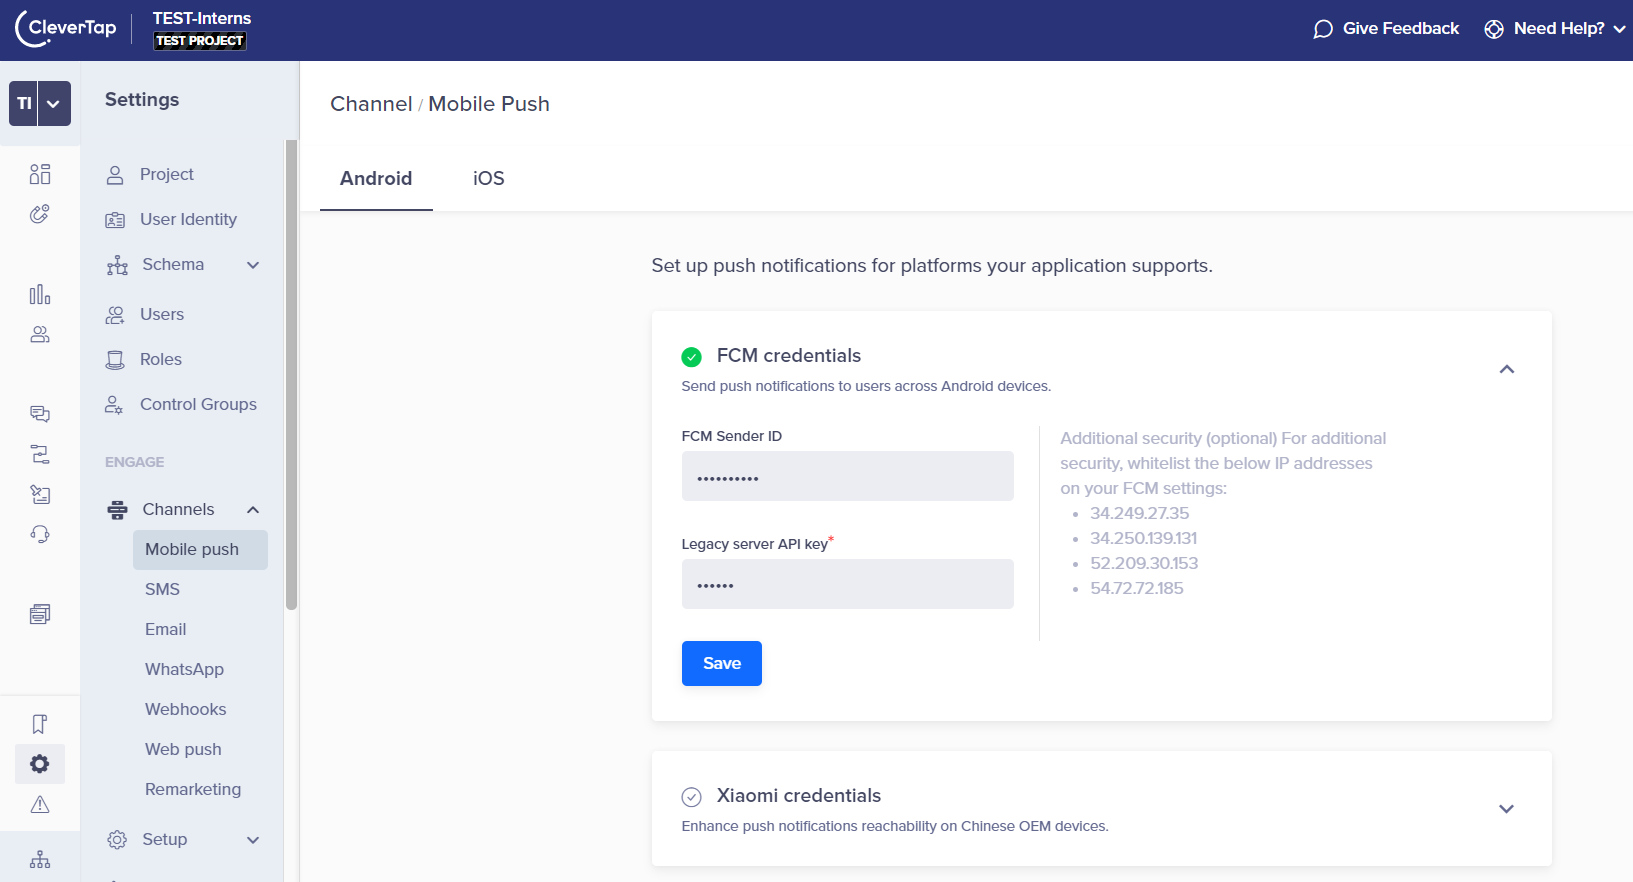
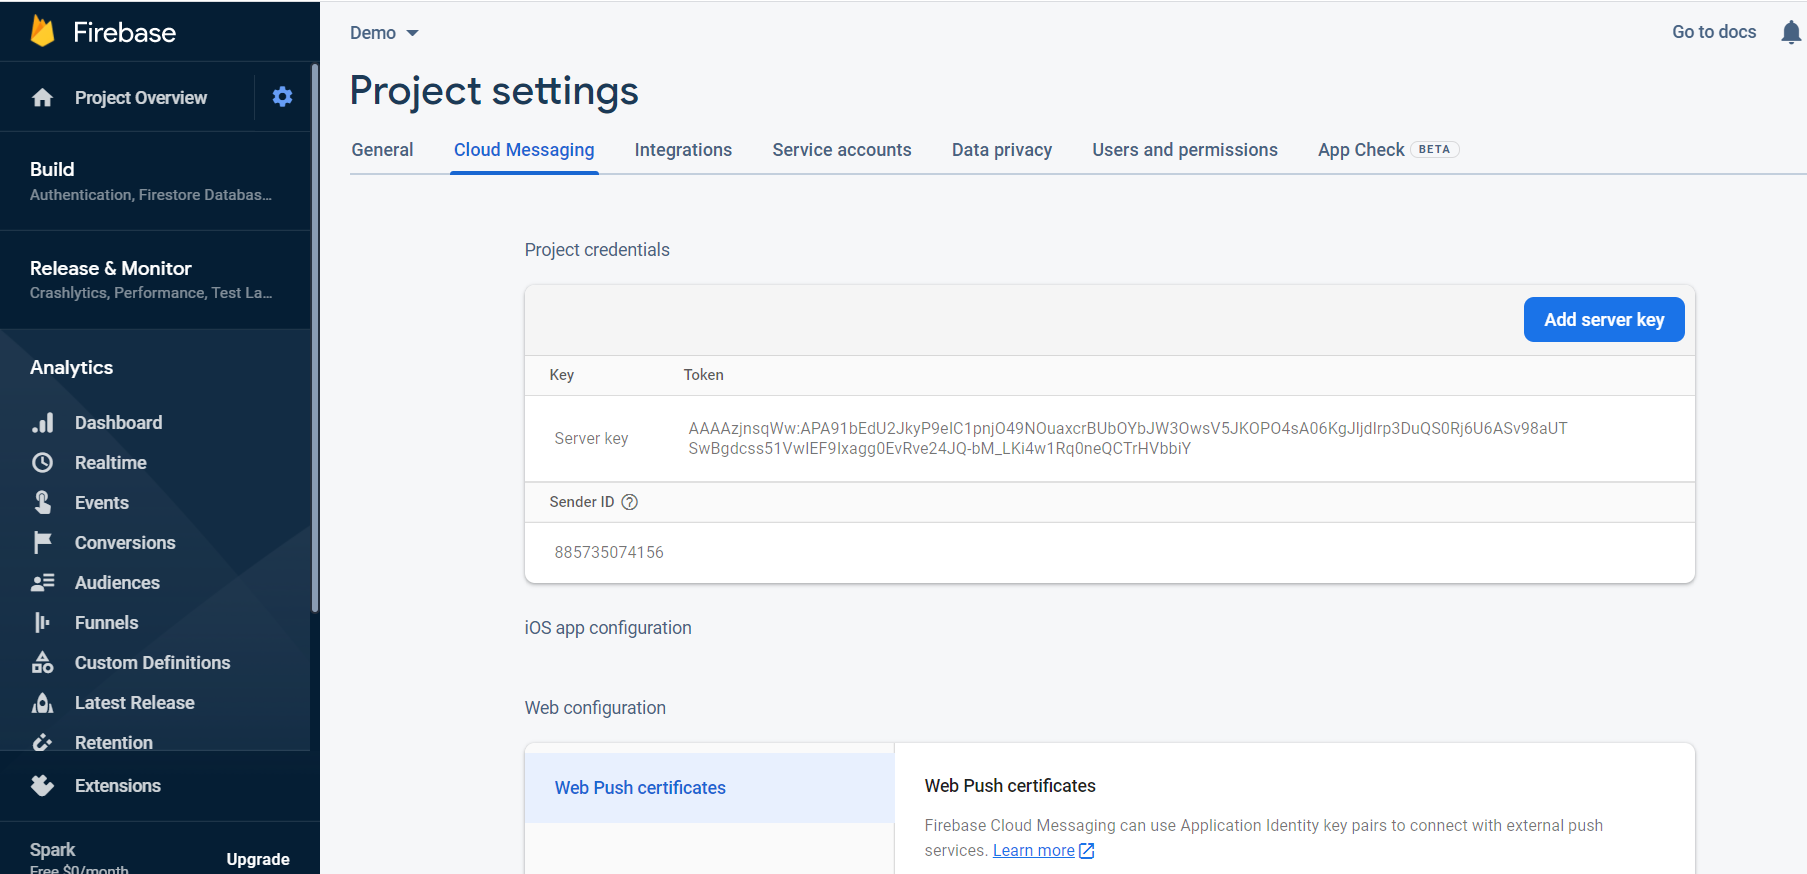
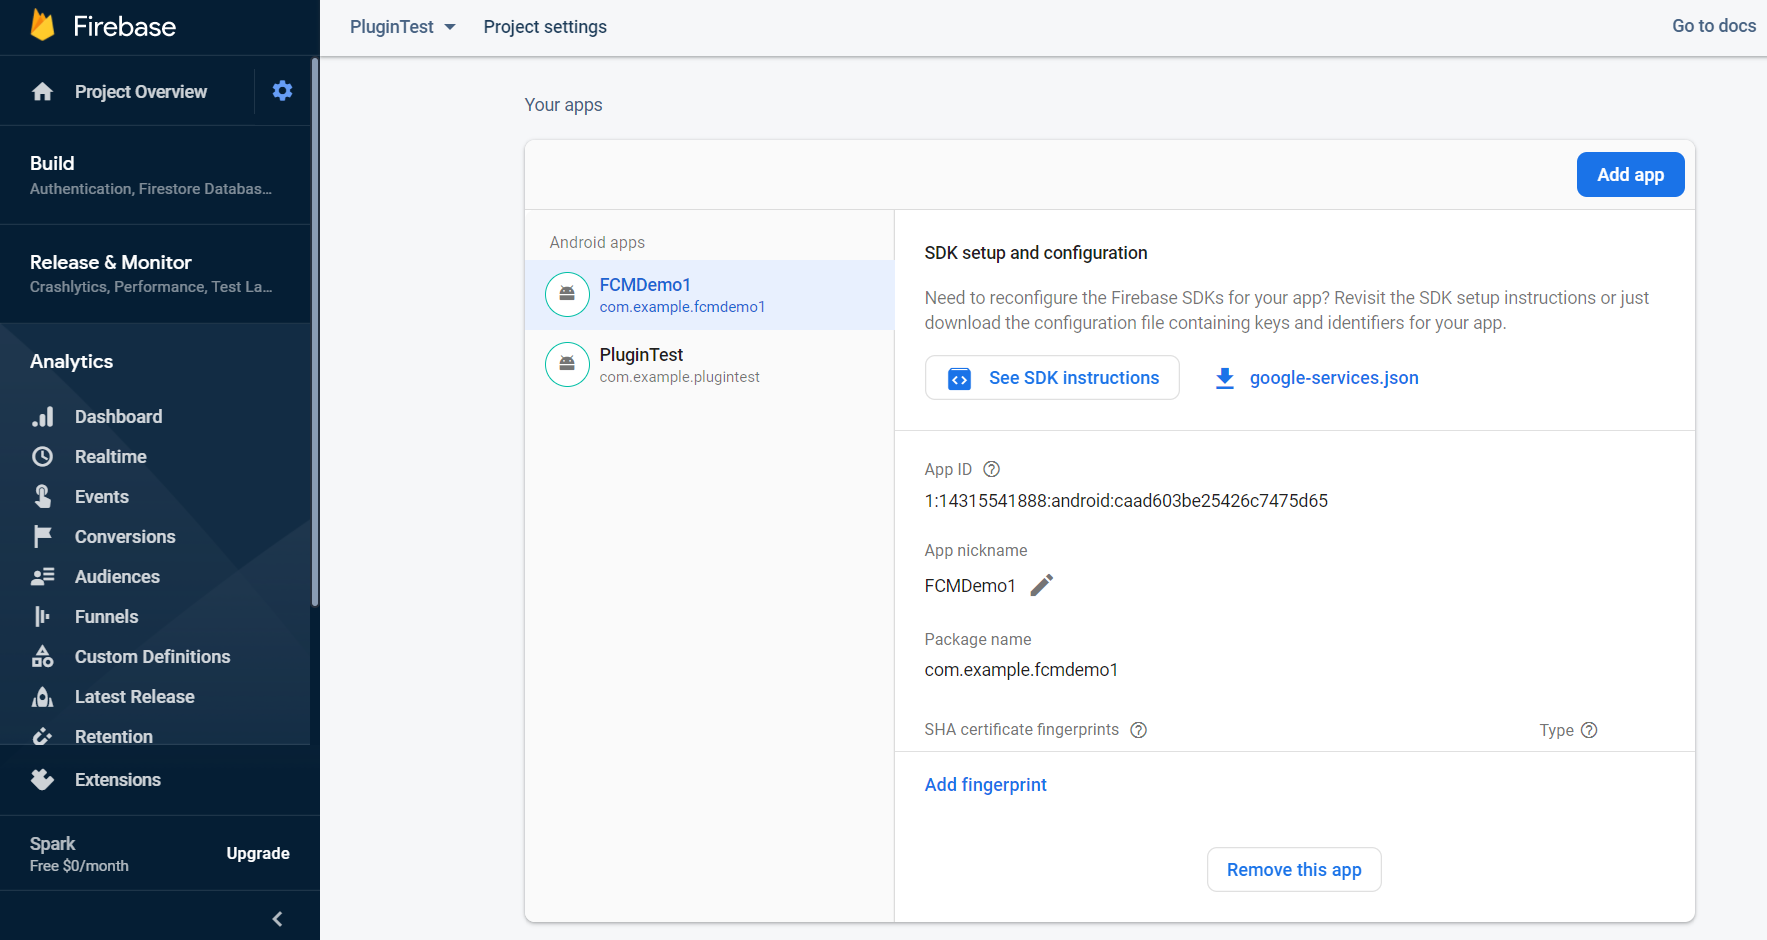
<meta-data
android:name="FCM_SENDER_ID"
android:value="id:(insert your value)"/>
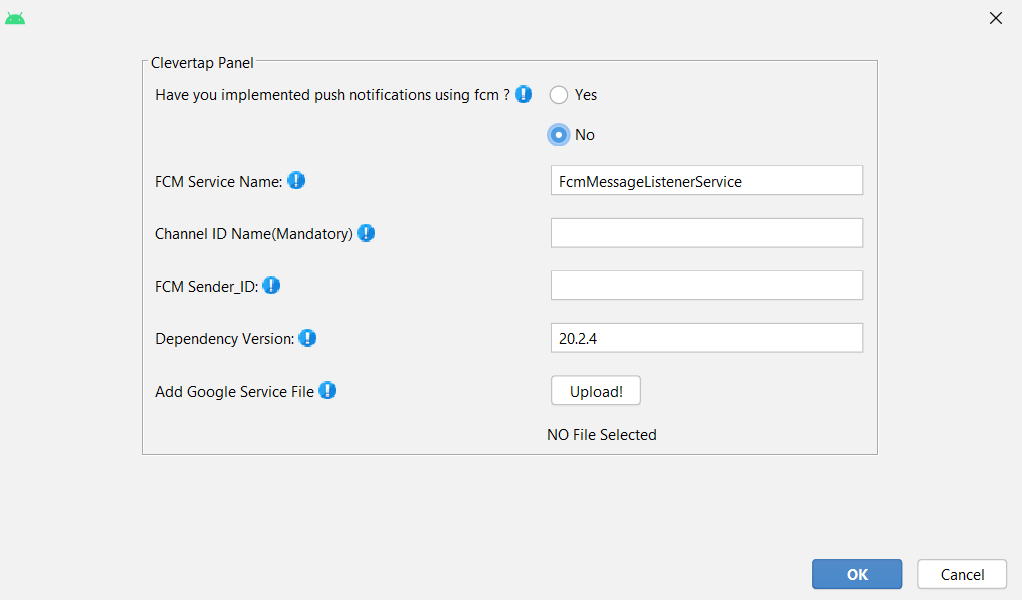
										dependencies {

											implementation 'com.google.firebase:firebase-messaging:20.2.4'

												implementation 'androidx.core:core:1.3.0'

										  //Mandatory for CleverTap Android SDK v3.6.4 and above add the following -

												implementation 'com.android.installreferrer:installreferrer:2.1'

										}

										// at the end of the build.gradle file

										apply plugin: 'com.google.gms.google-services'
Classpath ‘com.google.gms:google-services:4.3.3’
CleverTapAPI.createNotificationChannel(getApplicationContext(),"YourChannelId","Your Channel Name","Your Channel Description",NotificationManager.IMPORTANCE_MAX,true);
CleverTapAPI.createNotificationChannel(getApplicationContext(),"YourChannelId","Your Channel Name","Your Channel Description",NotificationManager.IMPORTANCE_MAX,true);
